
Saturday, December 19, 2009
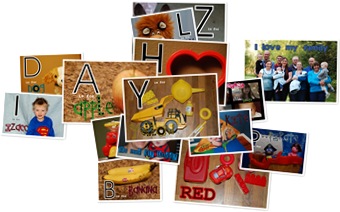
Pictures for Baby Learning Books
Please feel free to use these pictures! Or bounce off them and use them for ideas. Obviously some of them are very personalized, but you get the idea. Have fun!
Sunday, December 13, 2009
Advent Calendar
So I made an advent calendar this year. I finished it just in time for the first day, and am just now getting around to posting about it. It was super easy and took me two days to make, start to finish. (And that's saying a lot with my two kids!)

 Here's what I used:
8 sheets of white felt
red floss
28 red buttons
1/4 yard plaid material
clothesline
ribbon
1 big bag Ghirardelli Peppermint Bark

To make the stars, I printed the pattern off from here. Then I covered it with tape (just so it didn't get ruined by tracing) and traced it onto felt 6 times. Then I sewed a button into the middle of 3 stars. Then slip stitched two stars together, and right before getting all the way around, I stuffed them. I sewed them onto lengths of ribbon and tied bows of fabric to place on top. I like how they turned out! Super cute!
Oh! And to keep track of where we are, I printed these off, cut them out, attached them to some floss and tied them to each button. I placed them inside the envelopes with the chocolates and then every day when we take the chocolate out, we pull the dangle out too. Here we are today, 13 pockets in. So a big thank you goes out to Jenny B Harris over at Allsorts for the super cute idea! I love it! And so does my little man, who has been loving having a piece of yummy "special" chocolate every day!

I got the idea here.
 Here's what I used:
8 sheets of white felt
red floss
28 red buttons
1/4 yard plaid material
clothesline
ribbon
1 big bag Ghirardelli Peppermint Bark
 I cut 25 strips of felt that were 6 1/2"x2 1/2", then rounded the edges.

- I sewed the buttons on about and inch er so from one of the ends. (The basic instructions are here.)
- Then I folded up the end with a button to make a pocket, and used a slip stitch to go around the edges, like here.
- I then sewed a 4" length of floss to the top of the envelope and knotted it both on the bottom and the top, just to make sure it didn't pull through.
- I printed the numbers 1-25 off in one of my favorite cutesy fonts and traced them onto each envelope using one of those disappearing ink fabric pens. Then I just stitched them right on!
- I filled each one with a yummy piece of peppermint bark, which are the perfect size for these pockets! Then folded the flap over a clothesline and wound the string around the button to close it. I tied pieces of material by each one and ta-da! All done! I tied a bow on ether end and hung it in the hall.

To make the stars, I printed the pattern off from here. Then I covered it with tape (just so it didn't get ruined by tracing) and traced it onto felt 6 times. Then I sewed a button into the middle of 3 stars. Then slip stitched two stars together, and right before getting all the way around, I stuffed them. I sewed them onto lengths of ribbon and tied bows of fabric to place on top. I like how they turned out! Super cute!

Oh! And to keep track of where we are, I printed these off, cut them out, attached them to some floss and tied them to each button. I placed them inside the envelopes with the chocolates and then every day when we take the chocolate out, we pull the dangle out too. Here we are today, 13 pockets in.
 So a big thank you goes out to Jenny B Harris over at Allsorts for the super cute idea! I love it! And so does my little man, who has been loving having a piece of yummy "special" chocolate every day!
Saturday, December 12, 2009
Yipee
I have some exciting news.
I'm going to be featured over on a little blog called
Craftaholics Anonymous
A super cute blog, you should definitely go see her stuff. ADORABLE!
I'll be on December 15.
It's Readers Tutorial Week.
Check me out, would ya?
Good times.
Also, she is having super awesome giveaways December 14-18.
Really, go there.
Really.
Merry Christmas.
Monday, November 30, 2009
Thanksgiving Dinner Place Cards
I wanted to make out little Thanksgiving dinner a bit more formal this year. I made a beautiful centerpiece and decided we needed place cards as well. I found a cute idea here and decided to dive in. Here's how mine came together. I used:

Colored Cardstock
Patterned paper
Ribbon
Small letter stickers
1.5"x2" Photos
adhesive
Here's how you get the job done:
Cut the card stock into 4" x 9.5" pieces
Patterned paper
Ribbon
Small letter stickers
1.5"x2" Photos
adhesive
Here's how you get the job done:
Cut the card stock into 4" x 9.5" pieces

Score them at 2.5", 5" and 7.5"
Fold and adhere them into triangles
Fold and adhere them into triangles

Cut the patterned paper to 4" x 2.5"
Cut some card stock pieces to 4" x 1" Adhere card stock to patterned paper.
Add the names with small letter stickers.
(I had to mat a couple of the names because I bought the same color stickers as paper. Oops!)
Cover the seams with coordinating ribbon. Or contrasting ribbon, however you like it!
Cut some card stock pieces to 4" x 1"
 Adhere card stock to patterned paper.
Add the names with small letter stickers.
(I had to mat a couple of the names because I bought the same color stickers as paper. Oops!)

Cover the seams with coordinating ribbon. Or contrasting ribbon, however you like it!

Mat the little photos with cardstock 

Adhere the pictures to the patterned paper and add the assembled pieces to one side of the triangles.
They turned out so adorable and we'll be able to use them for years and years.

They turned out so adorable and we'll be able to use them for years and years.

Well, some of them will need to be updated, obviously...

Saturday, November 28, 2009
Thanksgiving Centerpieces
This year I made centerpieces. Thanksgiving centerpieces even! I got the idea here. She is brilliant! They were quite simple to make and turned out fabulous!
I found the glass vases and candle holders at Dollar Tree, however, my Dollar Tree did not have the tall 7 day candles. I found mine at Family Dollar, for $1.50.
After washing all the tags off, I hot glued the candle holders to the bottoms of the vases.

I then added some hot glue to the bottoms of the 7 day candles and glued them into the vases.

I then stuffed some fake leaves down the sides. I would have used real ones, but alas, all my leaves outside look like, well, crap. So I got some pretty and colorful ones.
Showtime! Here they are at the big game! I think they turned out marvelously, don't you?
And they're so very versatile and gorgeous. Here is what they are looking like these days...

I found the glass vases and candle holders at Dollar Tree, however, my Dollar Tree did not have the tall 7 day candles. I found mine at Family Dollar, for $1.50.

After washing all the tags off, I hot glued the candle holders to the bottoms of the vases.


I then added some hot glue to the bottoms of the 7 day candles and glued them into the vases.


I then stuffed some fake leaves down the sides. I would have used real ones, but alas, all my leaves outside look like, well, crap. So I got some pretty and colorful ones.

Showtime! Here they are at the big game! I think they turned out marvelously, don't you?

And they're so very versatile and gorgeous. Here is what they are looking like these days...

Saturday, November 7, 2009
SUPERMAN!
Call me thrifty, call me cheap, I don't even care. I will not spent $17 on a paper-thin, barely holding together by a thread Superman costume.
Not gonna happen.
So what's a crafty mom to do in such a situation?
We improvise, that' s what!
Long sleeved T shirt: $3.
Sweat pants: $3.
Rit Dye: $2.
Felt: $.25.
Yellow Fabric: $1.
Superman costume that will keep baby man warm and NOT fall apart the second time he wears it: PRICELESS!
Not gonna happen.
So what's a crafty mom to do in such a situation?

We improvise, that' s what!
Long sleeved T shirt: $3.
Sweat pants: $3.
Rit Dye: $2.
Felt: $.25.
Yellow Fabric: $1.
Superman costume that will keep baby man warm and NOT fall apart the second time he wears it: PRICELESS!

I found the Superman logo on the Web somewhere, printed it, cut it out and traced it onto red felt. I then placed red felt over yellow fabric and cut it along the edges and sewed it together onto the front of the shirt.
I dyed some of daddy's socks and an old pair of undies in some red Rit Dye.
Then I sewed a belt to the front of the undies and attached the back with Velcro. I also added red "belt loops" to the front, just for show.
I made the cape out of some scrap red I had left over from bridesmaid dresses I made a long time ago, used ribbon as a tie.
I stretched the now red socks over a pair of winter boots.
Done and done. My son loves to wear his shirt all the time and is begging me to make a Batman one.
Whew, maybe next year, after the holidays are over...
Tuesday, September 22, 2009
Baby Shower Invitations
Want to make the world's most adorable baby shower invitations? No sweat! Just follow my simple step-by-step instructions and in no time you can be enjoying fabulous invitations of your very own.
In my search for the perfect template, I ran across this little beauty.
 I said to myself, "Self, I could make that. I mean how hard could it be?" So I set out on my mission and here is what I found: not as easy as once suspected. However, they are pretty dang adorable, so I say worth it. Here we go.
First, find the most darling paper you can find.

Fold paper so that edges meet in the middle. (Might want to measure just to make sure it's not lopsided. I'm just sayin'...)

Then you want to fold it again, the exact same way only lengthwise. I mean, on a 12x12 piece of paper, there's really not a "lengthwise", but you get my drift, right?

Next, you draw4 circles on each end of the paper and then cut around them. It's easier to do this, I found, by tracing a bowl over the edges. And you might want to use a glass bowl and not a tupperware plastic bowl that doesn't hold it's shape and you get three done before you realize that your circles are a little, um, retardo. I'm just sayin...

You're going to need some plain paper in coordinating colors, or non-coordinating if that's how you roll. Whatever, I'm not here to judge. Cut them to the size of your squares in the middle of the paper, which happen to be 6" x 6"
Then you use something sticky to place the small squares onto the large paper. Sticky as in rubber cement or adhesive roller dots, not sticky as in gum or peanut butter. I'm just sayin...

Next, play with your adorable babies because they need attention too!

You'll want to get some ribbon in, again, coordinating colors. Or non-coordinating. Whatever.

Then let your creative juices flow as you place ribbon diagonal across your wording for the invitations. And tie some bows. Millions and millions of bows. Ug.

Place the bows over the ribbon on the invitations and use a bit of hot glue, or something else sticky, remembering the above mentioned rule as to what kind of sticky is and is not acceptable.

Next, you're going to want to dress up you big fat baby like a farmer. The reasons for this are um numerous because I don't think fourfold is a word. One: baby is large and in charge and if he doesn't wear said clothes now, he never will. Two: baby needs to be dressed. Three: baby is cute and fun to dress up. And four: it is just time for a break.
Next take the little scraps from the 12"x12" papers make them squares. Or triangles. Or hexagons, although that might be a bit too much work for what we're aiming for here. Again, not judging.

Use said shapes as backgrounds for any inserts you'd like to place in invitation. You know, like directions or where mother-to-be is registered or your favorite sandwich. Not that it matters to me, but why exactly you'd sent out invitations with your favorite sandwich included is a little weird. I'm just sayin...
Next, place the inserts on the finished invitation face, like so.
Then have yourself a little snack. Come on, you know you want some.
Next fold up the invitations so that they look like this:
And press them with your iron. Or car, but that might make them dirty and will probably ruin them. But hey, it's your prerogative.
Next you'll want to find the cutest and most annoyingly adorable sickly sweet baby girl stickers you can find.
Place aforementioned stickers on the seam, so that they will remained closed during shipping. The last thing you'd want is some unsuspecting mail carrier accidentally opening the invitation and finding out what your favorite sandwich is, right?

Then you address those puppies and mail them out.
 See? Simple as that. Hopefully it won't take you a week to finish them. Ahem.
In my search for the perfect template, I ran across this little beauty.
 I said to myself, "Self, I could make that. I mean how hard could it be?" So I set out on my mission and here is what I found: not as easy as once suspected. However, they are pretty dang adorable, so I say worth it. Here we go.
First, find the most darling paper you can find.

Fold paper so that edges meet in the middle. (Might want to measure just to make sure it's not lopsided. I'm just sayin'...)

Then you want to fold it again, the exact same way only lengthwise. I mean, on a 12x12 piece of paper, there's really not a "lengthwise", but you get my drift, right?

Next, you draw4 circles on each end of the paper and then cut around them. It's easier to do this, I found, by tracing a bowl over the edges. And you might want to use a glass bowl and not a tupperware plastic bowl that doesn't hold it's shape and you get three done before you realize that your circles are a little, um, retardo. I'm just sayin...

You're going to need some plain paper in coordinating colors, or non-coordinating if that's how you roll. Whatever, I'm not here to judge. Cut them to the size of your squares in the middle of the paper, which happen to be 6" x 6"

Then you use something sticky to place the small squares onto the large paper. Sticky as in rubber cement or adhesive roller dots, not sticky as in gum or peanut butter. I'm just sayin...

Next, play with your adorable babies because they need attention too!

You'll want to get some ribbon in, again, coordinating colors. Or non-coordinating. Whatever.

Then let your creative juices flow as you place ribbon diagonal across your wording for the invitations. And tie some bows. Millions and millions of bows. Ug.

Place the bows over the ribbon on the invitations and use a bit of hot glue, or something else sticky, remembering the above mentioned rule as to what kind of sticky is and is not acceptable.

Next, you're going to want to dress up you big fat baby like a farmer. The reasons for this are um numerous because I don't think fourfold is a word. One: baby is large and in charge and if he doesn't wear said clothes now, he never will. Two: baby needs to be dressed. Three: baby is cute and fun to dress up. And four: it is just time for a break.

Next take the little scraps from the 12"x12" papers make them squares. Or triangles. Or hexagons, although that might be a bit too much work for what we're aiming for here. Again, not judging.

Use said shapes as backgrounds for any inserts you'd like to place in invitation. You know, like directions or where mother-to-be is registered or your favorite sandwich. Not that it matters to me, but why exactly you'd sent out invitations with your favorite sandwich included is a little weird. I'm just sayin...

Next, place the inserts on the finished invitation face, like so.

Then have yourself a little snack. Come on, you know you want some.

Next fold up the invitations so that they look like this:

And press them with your iron. Or car, but that might make them dirty and will probably ruin them. But hey, it's your prerogative.

Next you'll want to find the cutest and most annoyingly adorable sickly sweet baby girl stickers you can find.

Place aforementioned stickers on the seam, so that they will remained closed during shipping. The last thing you'd want is some unsuspecting mail carrier accidentally opening the invitation and finding out what your favorite sandwich is, right?

Then you address those puppies and mail them out.
 See? Simple as that. Hopefully it won't take you a week to finish them. Ahem.
Thursday, May 7, 2009

Wednesday, April 1, 2009
Lightning and Mater
 These curtains were made by buying the charactr fabric in the middle and sewing the black and white checkered fabric at the top and bottom. I used a french seam to make it look flawless. Not bad for being 8 months pregnant, eh?
Saturday, January 10, 2009
Christmas 2008
Here are some fun things I made for Christmas of 2008.
I searched high and low and could not for the life of me find a pink tree skirt. So I made one. I used light and dark pink felt and, using another tree skirt as a pattern, and cut pie shapes of both. I sewed them together and then sewed lengths of black ribbon over the seams. I then cut black felt to match the perimeter and sewed it on, again, covering the seam with black ribbon. I then tied pink ribbon into bows and hot glued them over the ribbon/seams. Then I hot glued black ribbon to form closures. It turned out fabulous.
I also made my son a Christmas outfit for church. Please oh please disregard the messy face and sweat pants.
Here are some gifts I made using pre-cut wood crafts. The nativity came as a set, and I painted it and put it together using hot glue and wood glue. I sued burlap and satin for the head covers.
The stockings and heart wall hanging I used wire and plaid fabric, which was ripped into 1"x6" strips. I painted the wood pieces and attached them to each other with hot glue, then hung them with wire. The heart says, "The stockings were hung by the chimney with care" and I just used a paint pen to apply the words, although I think it would have been amazing with vinyl lettering.
Family blocks were painted, sanded and have vinyl applied.
The other decoration was painted and the smaller pieces attached with curled wire. I tied a ribbon to act as a hanger on the top.
Let's not forget about the candy I made for my neighbors. Yum, yum!
 Mexican Wedding Cookies
1 cup (2 sticks) butter, softened
2 1/2 cups confectioners' sugar, divided
2 teaspoons Vanilla Extract
1/2 teaspoon Nutmeg
1/8 teaspoon salt
2 cups flour
2 cups finely chopped pecans (optional)
(I made mine without pecans. They were heavenly)
Preheat oven to 350°F. Beat butter in large bowl with electric mixer on medium speed until light and fluffy. Add 1/2 cup of the sugar, vanilla, nutmeg and salt; beat until well blended. Stir in flour and pecans. Shape into 1-inch balls. Place 1 inch apart on ungreased baking sheets. Bake 15 minutes. Remove from baking sheets. Immediately roll hot cookies in remaining 2 cups sugar. Place sugared cookies on wire racks to cool. When cool, roll again in sugar.
Divinity
(or "fairy poop" as my brother calls it)
3 cups granulated sugar
1/2 cup light corn syrup
2/3 cup warm water
2 egg whites
1 tsp vanilla extract (or other flavor of your choice)
Prepare a cookie sheet by lining it with aluminum foil and spraying the foil with nonstick cooking spray, or lining it with wax paper. Combine the sugar, corn syrup and water in a large heavy-bottomed saucepan over medium heat. Cook, stirring constantly, until the sugar dissolves. Continue cooking without stirring until the mixture reaches 250 degrees, firm-ball stage. In the meantime, beat the egg whites in the bowl of a large standing mixture until stiff peaks form. Slowly pour about half of the sugar syrup into the egg whites, beating constantly. Continue to cook the remaining syrup until it reaches 270 degrees, soft-crack stage. Stream the remaining syrup mixture into the egg whites while the mixer is running. Continue to beat until the candy is thick, shiny and holds its shape. Mix in extract until fully incorporated. Drop by the teaspoonful onto cookie sheet, and let cool until full set.
Fudge
1 1/2 c Milk
4 oz Unsweetened chocolate (sqs)
4 c Sugar
3 tb Light corn syrup
1/4 ts Salt
3 tb Butter or margarine
1 1/2 ts Vanilla
Combine milk and chocolate in medium-size heavy saucepan; cook over low heat until chocolate is melted. Add sugar, corn syrup and salt and cook, stirring constantly, to boiling.
Cook, without stirring to 234F on a candy thermometer. (A teaspoonful of syrup will form a soft ball when dropped into cold water.) Remove from heat at once. Add vanilla and butter or margarine, but do not stir in. Cool mixture in pan to 110F, or until lukewarm; beat with wooden spoon until mixture thickens and begins to lose its gloss. (This will take about 15 minutes.)
Spread in a buttered 8x8x2" pan. Let stand until set and cool; cut into squares.
Grandma Cannon's Carmels
2 cups sugar
2 cups Karo syrup
Stir together and continue stirring and boiling until it begins to thicken. Add 1 cup butter a little at a time while stirring and boiling. Add a few grains of salt. Very slowly pour in 2 cups whipping cream, slow enough that it never stops boiling. Keep stirring until it reaches a soft firm stage, 230-234 degrees. Add vanilla and pour into buttered 8"x11" pan. Let cool, cut and wrap in waxed paper. Enjoy.

I searched high and low and could not for the life of me find a pink tree skirt. So I made one.
 I used light and dark pink felt and, using another tree skirt as a pattern, and cut pie shapes of both. I sewed them together and then sewed lengths of black ribbon over the seams. I then cut black felt to match the perimeter and sewed it on, again, covering the seam with black ribbon. I then tied pink ribbon into bows and hot glued them over the ribbon/seams. Then I hot glued black ribbon to form closures. It turned out fabulous.
 I also made my son a Christmas outfit for church.
 Please oh please disregard the messy face and sweat pants.
Here are some gifts I made using pre-cut wood crafts.
 The nativity came as a set, and I painted it and put it together using hot glue and wood glue. I sued burlap and satin for the head covers.
The stockings and heart wall hanging I used wire and plaid fabric, which was ripped into 1"x6" strips. I painted the wood pieces and attached them to each other with hot glue, then hung them with wire. The heart says, "The stockings were hung by the chimney with care" and I just used a paint pen to apply the words, although I think it would have been amazing with vinyl lettering.
Family blocks were painted, sanded and have vinyl applied.
The other decoration was painted and the smaller pieces attached with curled wire. I tied a ribbon to act as a hanger on the top.
Let's not forget about the candy I made for my neighbors. Yum, yum!
 Mexican Wedding Cookies
1 cup (2 sticks) butter, softened
2 1/2 cups confectioners' sugar, divided
2 teaspoons Vanilla Extract
1/2 teaspoon Nutmeg
1/8 teaspoon salt
2 cups flour
2 cups finely chopped pecans (optional)
(I made mine without pecans. They were heavenly)
Preheat oven to 350°F. Beat butter in large bowl with electric mixer on medium speed until light and fluffy. Add 1/2 cup of the sugar, vanilla, nutmeg and salt; beat until well blended. Stir in flour and pecans. Shape into 1-inch balls. Place 1 inch apart on ungreased baking sheets. Bake 15 minutes. Remove from baking sheets. Immediately roll hot cookies in remaining 2 cups sugar. Place sugared cookies on wire racks to cool. When cool, roll again in sugar.
Divinity
(or "fairy poop" as my brother calls it)
3 cups granulated sugar
1/2 cup light corn syrup
2/3 cup warm water
2 egg whites
1 tsp vanilla extract (or other flavor of your choice)
Prepare a cookie sheet by lining it with aluminum foil and spraying the foil with nonstick cooking spray, or lining it with wax paper. Combine the sugar, corn syrup and water in a large heavy-bottomed saucepan over medium heat. Cook, stirring constantly, until the sugar dissolves. Continue cooking without stirring until the mixture reaches 250 degrees, firm-ball stage. In the meantime, beat the egg whites in the bowl of a large standing mixture until stiff peaks form. Slowly pour about half of the sugar syrup into the egg whites, beating constantly. Continue to cook the remaining syrup until it reaches 270 degrees, soft-crack stage. Stream the remaining syrup mixture into the egg whites while the mixer is running. Continue to beat until the candy is thick, shiny and holds its shape. Mix in extract until fully incorporated. Drop by the teaspoonful onto cookie sheet, and let cool until full set.
Variation: Divinity can be poured into a 9-inch square pan, cooled, and cut into small squares instead of being dropped from a spoon.
Fudge
1 1/2 c Milk
4 oz Unsweetened chocolate (sqs)
4 c Sugar
3 tb Light corn syrup
1/4 ts Salt
3 tb Butter or margarine
1 1/2 ts Vanilla
Combine milk and chocolate in medium-size heavy saucepan; cook over low heat until chocolate is melted. Add sugar, corn syrup and salt and cook, stirring constantly, to boiling.
Cook, without stirring to 234F on a candy thermometer. (A teaspoonful of syrup will form a soft ball when dropped into cold water.) Remove from heat at once. Add vanilla and butter or margarine, but do not stir in. Cool mixture in pan to 110F, or until lukewarm; beat with wooden spoon until mixture thickens and begins to lose its gloss. (This will take about 15 minutes.)
Spread in a buttered 8x8x2" pan. Let stand until set and cool; cut into squares.
Grandma Cannon's Carmels
2 cups sugar
2 cups Karo syrup
Stir together and continue stirring and boiling until it begins to thicken. Add 1 cup butter a little at a time while stirring and boiling. Add a few grains of salt. Very slowly pour in 2 cups whipping cream, slow enough that it never stops boiling. Keep stirring until it reaches a soft firm stage, 230-234 degrees. Add vanilla and pour into buttered 8"x11" pan. Let cool, cut and wrap in waxed paper. Enjoy.
Subscribe to:
Posts (Atom)